This post may contain affiliate links, which means by clicking on them you help support a homeschooling mom and her incredibly overworked husband! We appreciate each and every click!
There’s something so special about the Fourth of July- in fact, it happens to be one of my favorite major holidays. It’s such a no-stress type of holiday where everyone is more easygoing, the red, white, and blue everywhere is just so darn festive, and the allure of a beautifully burst firework cannot be denied!
It’s not just special to me, though… it happens to mean a lot to my whole family too. ‘God Bless the U.S.A.’ makes all of us cry, we all have very soft spots in our hearts for the men and women who sacrifice to keep us safe, and two of my sons have aspirations to join the Air Force and the Navy.
To say we are patriotic is putting it mildly… in our home, we bleed red, white, and blue. That’s why we find it nigh to impossible to limit our flag-waving to one singular day per year.
Because it’s a favorite holiday, I love to decorate for it, I love to celebrate it, I just love it! I spend hours scouring Pinterest for craft ideas and then I’ll spend time throughout the year creating crafts and decorations for each impending July.
Which brings me here today (better late than never!)- to share with you all the neat things I dreamed up and created this year! Thanks to my friends at Oriental Trading, I’m able to bring these awesome ideas directly to you- and you can find everything you need to make them yourself, right on their website! Easy, peasy!
Americana Flag Vases
This idea came from the Oriental Trading website and I copied it in its entirety. No creative license here!
Supplies Needed:
Red, White, and Blue Acrylic Paint
Paintbrushes
Contact Paper
Scissors
Painters Tape
High Gloss Clear Coat
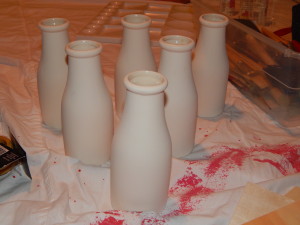
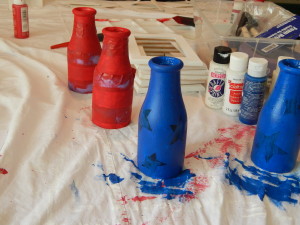
Don’t be put off by the milk bottles when you order them- you get a full dozen which is a really great deal. For some reason I only thought I was getting 3 (serves me right for not thoroughly reading the description!)
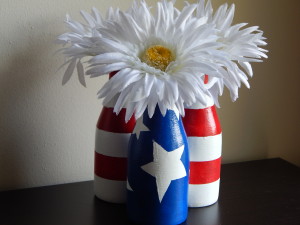
To start, I put a full white coat on 3 of the milk bottles (because they arrive in sort of a creamy-ish color). Once I gave the white paint a chance to cure (for a day or two), I wrapped 2 of the bottles with painters tape in alternating bands. A few coats of some bright red paint and my stripes were complete!
For the third bottle, I cut a bunch of stars out of contact paper (I used my chalkboard contact paper- it was all I had on hand!), pressed them on the bottle securely, and used a foam brush to layer on several thin coats of blue. Before the paint dried completely, I peeled off the stars to ensure the paint wouldn’t peel off with them!
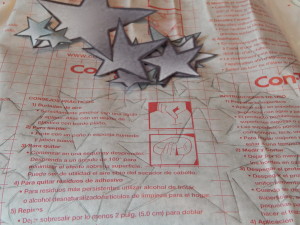
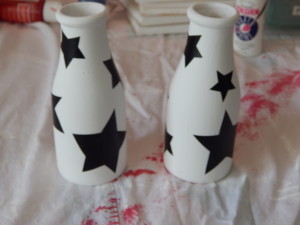
Again, a few more days to cure and then a quick spray with some high gloss clear coat (I like things shiny!) and I was all set. A short stop at Michael’s for some happy little daisies and now I have a festive tabletop decoration for my foyer!
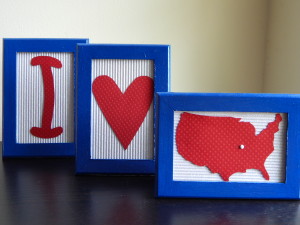
I {heart} America Frames
Another idea from Oriental Trading’s website, but this one I changed substantially!
Supplies Needed:
- Blue Acrylic Paint (or paint color of your choice)
- Paintbrushes
- Scrapbook paper (for background and letters/pattern)
- Craft glue
- Scissors
- Brads/tacks, if desired
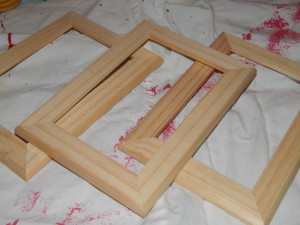
- Wood Picture Frames
- High Gloss Clear Coat
This was a very simple project, but I had a lot of fun doing it! These frames are made from real wood and come with actual glass- so they are definitely quality. Once again, you get a ridiculous amount of product for the money you spend- so you have a lot of frames left over for future crafts. Such a win, win!
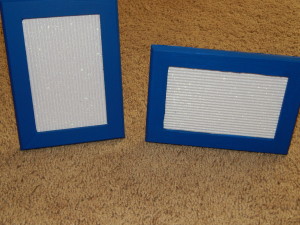
First, I took the glass out of the frames (you won’t be using it for this craft), then painted each frame blue.
Once I had nice coverage on the frames, I sprayed each with a high gloss clear coat (again, like things shiny!). Then I took the glass and used it as a template to trace the background needed onto the scrapbook paper. (Notice I used a glittery corrugated paper- love the sparkle!)
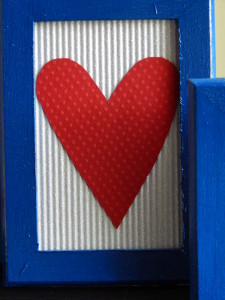
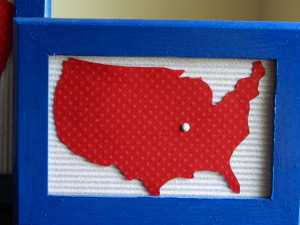
Lastly, I used my computer to print out an ‘I’ in a font I liked and Google images to find a heart and an outline of the USA that I could trace and cut out of an adorable raised dot paper.
Once I glued them all down, I used a sharp pin to make a hole that marks the city where I live and then placed a brad there! Such a great way to display your love for your country (and your city)!
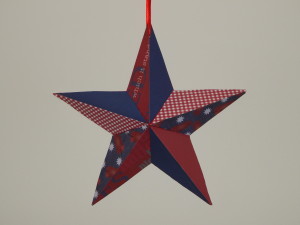
Patriotic Barn Star
This idea was found on the Oriental Trading website. I stuck fairly close to their design on this craft.
Supplies Needed:
- Red Acrylic Paint
- Paintbrushes
- Scissors
- Wooden Barn Star
- 4th of July Paper Kit
- Mod Podge
This was one of my favorite projects, partly because it was super easy and partly because it turned out so dang cute! I was really impressed with the barn star I received from Oriental Trading for this craft. It was much larger than I had anticipated and was very nicely constructed. I’m not sure what I was actually expecting, but it certainly exceeded my expectations!
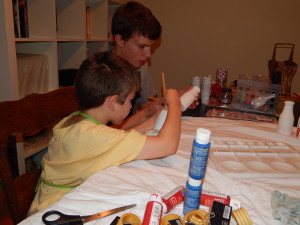
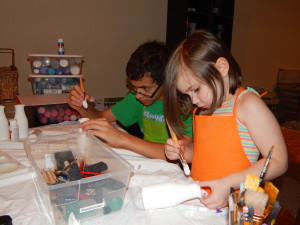
My son, Drew, decided to help take over the tedious part of choosing papers and cutting out angles on this one. Whew! NOT my favorite part of any craft. (Measure twice and cut once, they always say!) We went with the papers that had sort of a rustic coloring on them, as this is a barn star and we wanted to keep with that ‘Americana’ feeling.
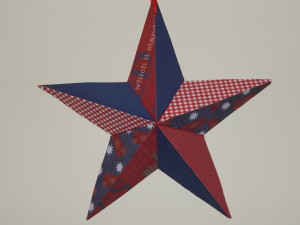
Because the angles aren’t ‘perfect’, we chose to paint the star with just a single coat of deep red, so no natural wood would show through if the paper didn’t cover completely. Once the paint was dry and the paper was cut, it was time to assemble!
A bottle of mod podge and a paintbrush is all you need! Slap a nice coat on your barn star (not too thick, not too thin) and then place your papers in order, smoothing gently to work out any air bubbles. (I worked in sections because mod podge sometimes has a tendency to set up fast.) After your papers have a few minutes to ‘set’ where they won’t slide around if pressure is applied, take some more mod podge and apply to the top of your papers to seal them.
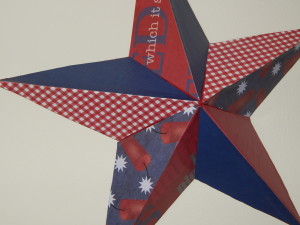
This is where it’s important to work is slow even strokes and limit the number of brushstrokes you make- because they WILL show on your finished piece. I made sure to pull all my brushstrokes in one sweeping direction so they blended and feathered together and the finished product was {for the most part} smooth, clean, and gorgeous!
My original intention was to scuff up the piece a touch and add a soft brown glaze to give more of that rustic touch, but the mod podge gave it such a beautiful luster that I just had to leave it be. I just ADORE how it turned out!
Starry Night Luminaries
This idea is located on the Oriental Trading website. I went rogue on this one! 😉
Supplies Needed:
- Mason Jars (any size you prefer- I chose pint)
- Contact Paper
- Scissors
- Martha Stewart Glitter Paint in Red, White, and Blue (it’s imperative to use name brand here!)
- FOAM paintbrushes
- Battery Operated Tea Lights
- Jute or Thin Metal Wire for hanging
- High Gloss Clear Coat
Disclaimer: This one is TIME CONSUMING! But so worth it!
I have to be honest- I already had the mason jars. As an urban homesteader, y’all know I am all about living with LESS to get MORE from life (my tagline!), so it’s no surprise that I can fruits and veg, make all my own homemade soaps and cleansers, and own my weight in mason jars (we even use them as drinking glasses!).
But in a household with four children, you can imagine that I don’t always have ‘meticulously maintained’ mason jars. Edges get chipped by a shoddily loaded dishwasher, cracks appear from 3 too rough sons… you get the picture. So, I decided to use my ‘not-so-perfect’ jars to do this craft!

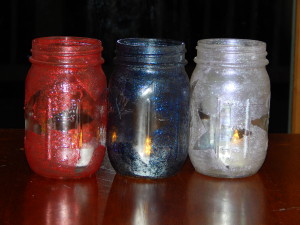
I didn’t follow OT’s directions at all on this one- I paved my own way. I once again turned to my trusty chalkboard contact paper and traced out some large stars. Once I had those firmly stuck to the sides of my jars, I grabbed my foam paintbrush (imperative to use foam here) and the most beautiful glitter paint I’ve ever seen (thanks Martha!), and I started painting.
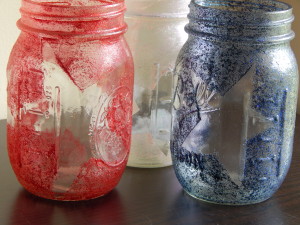
I won’t lie- it took FOREVER! I felt like I would NEVER finish. You HAVE to take your time and put on several thin layers of paint. And you have to go slow to ensure that your paint doesn’t slip up under your star cutouts- and even with those precautions, some still will. But, I just took my time and worked methodically and what took shape was nothing less than breathtaking!
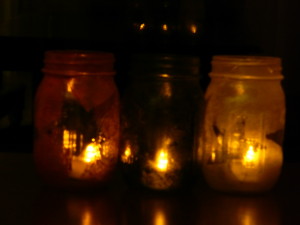
Once you finish with the last coat, peel off the stars and try not to take any extra paint with them! (Some will still come off- it’s the nature of paint, so be prepared for touchups.) Let your jars cure for a day or two and then, if desired- spray with a high gloss clear coat. (You know I did!)
Grab some battery operated tea-lights (they never burn out and don’t cause fires!) and string some jute around the rim of your jars. Then, hang your luminaries outside and gear up for your 4th of July barbecue!
Even though Independence Day was over a month ago, these crafts work great for Memorial Day, Veterans Day, and any other time you feel the need to fly Old Glory.
I personally feel there’s no such thing as a bad time to celebrate the red, white, and blue. As we all know, freedom is never free and that should be celebrated every day of the year.
Enjoy your holiday and happy crafting!
_____________________________________________________________
If you’ve never heard of Oriental Trading, what rock have you been living under?!? They are world renowned for amazing party, teaching, and craft supplies, and all of it is ridiculously affordable! As a homeschooling family with only one income, we rely heavily on Oriental Trading and their huge selection/low prices to help us stock our classroom and have fun interactive lessons. You should check them out today!
The reviews for the products above are based strictly on my own opinion(s) and/or experience(s). Others may have a different opinion and/or experience with the aforementioned product(s). I was provided the sample(s) free of charge by the company and I provided my honest opinion. No other type of compensation was received for this review.





Leave a Reply